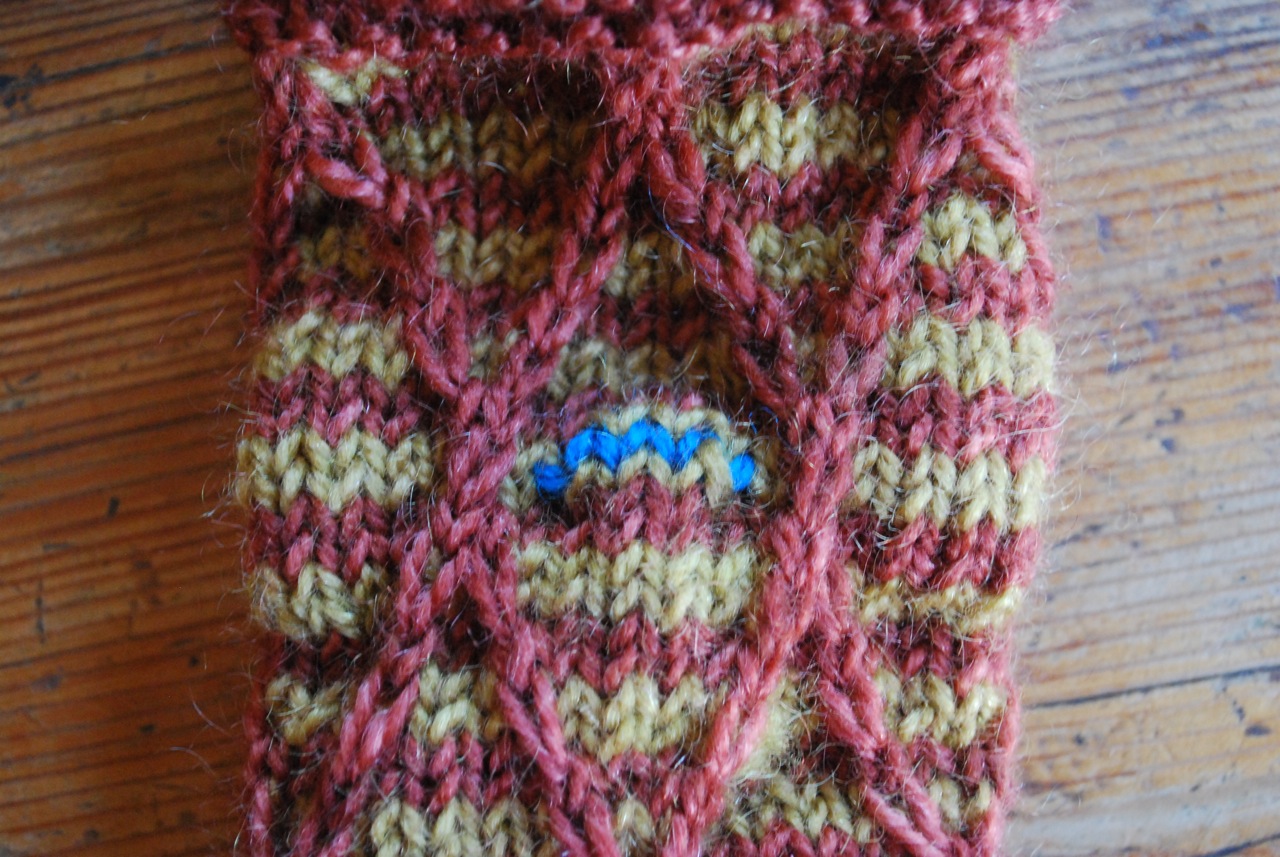
Elizabeth Zimmermann calls this the thumb-trick in her Knitter's Almanac. Knit 4 stitches with contrasting yarn - that's the bright blue above. After knitting those stitches, put them back on the left hand needle and knit them again with the working yarn. Note - if you're working with finer yarn, you'll probably need to increase the number of contrasting stitches.
Continue to work the rest of the mitt. After the mitt is finished and off the needles, it's time for the thumb.

The blue strand marks the spot where the thumb will be. Open up the thumb hole by unraveling the blue yarn and exposing live stitches.
Unravel stitch by stitch.

Put the stitches on needles right away.
If the stitches get away, it can be messy.

Keep unraveling until the contrasting yarn is free.

After all the unraveling there will be two sets of stitches and a thumb hole. For this thumb there are 3 stitches on one needle and 4 on the other. Due to the way stitches are constructed there will be an odd number of stitches after removing the contrasting yarn.
Knit across the stitches that will make up the bottom side of the thumb.

Pick up stitches in the gap between the two needles.
Knit across the top set of stitches and pick up stitches in the gap on the other side.

Stitches all around, ready to become a thumb.
All that's left is to work the thumb.

This thumb is done, ready for a bind off. Remember the thumb-trick, a quick and clever technique.
No comments:
Post a Comment